Onbu Management: Beyond Just Feeding
The relationship with Onbu is your most critical resource. The Nomad's Compass update made Mood and Health management more complex and unforgiving.
Mood and Trust Manipulation
The Secret to Guiding Success
Never attempt a Guidance Task (from the Communication Hub) when Onbu’s Mood is below 75%. A failed guidance attempt severely penalizes Trust, making the next attempt even harder.
- Trick: If Mood is low, spam simple, non-guidance interactions (like "Pet" or "Clean") from the Communication Hub. These cost minimal resources and time but reliably increase Mood, paving the way for a successful guidance attempt.
- Pro Tip: Once you unlock the Onbu Whisperer role in the Training Hall, assign a Villager immediately. Their success bonus dramatically reduces the failure chance on Guidance Tasks, allowing you to influence Onbu's path more reliably toward favorable biomes.
Avoiding the "Shake Off" Catastrophe
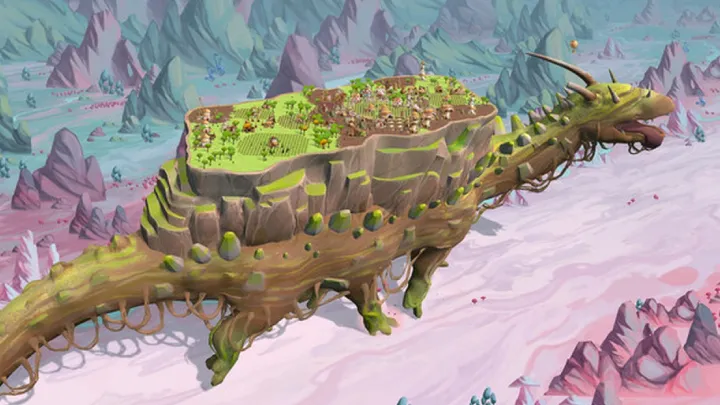
The Shake Off event (where Onbu violently shakes the village, destroying unsecured structures) is the number one cause of late-game run failure.
- Tip: Prioritize Reinforced Foundations research and construction. Place every essential structure (Research, Food Storage, Water Tanks, Clinics, Communication Hub) on a Reinforced Foundation before expanding aesthetic or less critical buildings. The small resource cost is insurance against total structural collapse.
- Emergency Buffer Placement: Strategically build your Emergency Buffer System storage near the center spine of Onbu's back. This location is generally the safest from environmental damage (like spores or heat) and is slightly less prone to damage during a minor, localized shake.
Proactive Health Management
Don't wait for Onbu to get sick.
- Early Antifungal: Even before entering the Deep Jungle Biome, research and stockpile a small amount of Antifungal Medicine. The moment Onbu contracts a Fungal Infection (which happens quickly in the Jungle), apply the treatment immediately via the Ailment Clinic to prevent the health damage spiral.
- The Toxin Neutralizer Gambit: The Toxin Neutralizer Injection is a high-cost, high-Trust-loss item used to force Onbu to stop briefly in a dangerous biome. Use this only as an extreme emergency. The best time to use it is to stop precisely over a dense patch of high-tier Ancient Artifacts or a critical patch of Water Sponges (in the desert) that you absolutely need for advanced tech. The momentary resource gain must outweigh the massive Trust penalty.
Resource Strategy: Maximizing Efficiency and Safety
Efficient resource conversion and smart storage are vital for long-term stability.
Exploiting the Deep Jungle Biome
The Jungle is a resource trap if you are unprepared, but a massive boon if you know what to target.
Bio-Resin Priority
Bio-Resin is the most valuable resource in the Jungle. It is required for the best structures and protective coatings.
- Trick: Instead of focusing Scavenging Teams on generic Jungle Wood, prioritize the new Resin Sap Collector building near large, ancient trees. Assign your best Master Scavenger (from the Training Hall) to the associated collection area for maximum yield.
- The Treated Lumber Cycle: Only use Treated Lumber (made from Jungle Wood) for exposed buildings. Continue using basic Planks for indoor, protected structures like storage and housing. This conserves the valuable Jungle Wood, allowing you to save it for making more Bio-Resin or specialized buildings.
The Emergency Buffer System
Treat the Emergency Buffer as your Run Insurance Policy.
- Optimal Reserves: Allocate enough storage space in the Buffer to hold resources for approximately 5-7 days of sustained consumption (Food, Water, Basic Medicine).
- Setup: Set the trigger release threshold high—around 20% of your total remaining resource. If your water drops below 20%, the Buffer releases, giving you time to implement the Forced Stop or repair your Air Wells before panic sets in. Never let your primary resources dip close to zero.
Power Management
- Hybrid Power: Do not rely solely on one power source. Use Wind Turbines (reliable but space-consuming) as your baseline power for essential structures like Water Collectors. Then, supplement with the Biomass Converters (Jungle Tech) for production spikes. If the wind dies down, your critical systems still function.
Village Optimization: Villager and Building Placement
Smart village layout and specialized roles minimize travel time and maximize output.
The Specialization Advantage
The Training Hall is arguably the most powerful mid-game structure.
Role Prioritization
- Onbu Whisperer: (Immediate priority). Secures your ability to choose biomes.
- Master Scavenger: (Second priority). Increases the yield of rare, finite Scavenging resources like Ancient Artifacts and high-tier seeds.
- Master Farmer: (Third priority). Increases food production, freeing up other villagers for construction or research.
- Tip: Only specialize villagers who have the highest Loyalty (lowest chance of leaving during a crisis) or the highest Efficiency from the start.
Building Layout and Flow
Minimize travel time between associated buildings.
- Food Block: Place Farms, Water Sources (Air Wells/Collectors), the Granary (Food Storage), and the Kitchen all within a tight cluster. Villagers spend less time hauling food and water and more time producing it.
- Production Hub: Locate the Sawmill, Quarry, and Advanced Workshop near the center of Onbu's back to minimize travel distance to the majority of construction sites.
Utilizing Onbu's Verticality
Don't be afraid of the spikes and sides.
- Vertical Farms: The spikes on Onbu's back are excellent for placing vertical-oriented structures like Advanced Farms or Air Wells. While harder to access, they free up valuable, flat space on the main plateau for dense housing and production.
- Side Attachments: Prioritize putting the Fungicide Sprayer and Cooling Station attachments (which require side placement) on the side that is currently facing the incoming environmental hazard (e.g., placing the Sprayer on the Jungle-facing side).
Research and Progression Tips
Strategic research dictates your preparedness for upcoming biomes.
The Research Fast Track
- Phase 1: Rush Air Wells, Basic Feeding Trellis, and the Communication Hub. These are non-negotiable for stability.
- Phase 2: After meeting basic needs, research Reinforced Foundations and Treated Lumber simultaneously. This prepares you for both the potential of an angry Onbu and the structural decay of the Jungle.
- Phase 3: Prioritize the Training Hall and the Emergency Buffer System before researching highly specialized tech (like Toxin Neutralizer). The specialization and insurance they offer provide the best mid-to-late game stability.
Scavenging Optimization
When Onbu stops, every second counts.
- Prioritize New Zones: Always send Scavenging Teams to the farthest, most recently accessible areas first. These spots often hold the rarest items like Ancient Artifacts or new Seed Types.
- Resource Mapping: Use the map overlay to visually check the concentration of Iron Ore or Coal deposits before sending a team. Don't waste time on low-yield scavenging spots unless absolutely desperate for wood or stone.
By adopting these advanced tips, you shift your gameplay from merely reacting to Onbu's movements and biomes to proactively shaping your environment and maximizing the symbiotic relationship, turning your village into a sustainable, mobile fortress.
